5 Steps to packing the perfect cooler
June 12, 2015

Summer is in full swing, and with a warm weekend ahead, we’re psyched to get a couple twelve packs of Summer Time and Amber cans (find them near you using our Cider Locator) and head out for some good times. From tailgating at concerts and sports venues to enjoying the outdoors with friends and family, a cold Woodchuck is a welcome treat during the warm summer months.
Over the years we’ve packed up our fair share of coolers, and we’ve picked up some pretty handy tricks and cooler tips to get the most out of our space, making our cider the coldest it can be, and keeping it nice and chilled until we are ready to indulge.
Step 1. Packing a cooler is a science. No, seriously, it is…
So how do you pack the perfect cider cooler? Well you start with your refrigerator. Give your cider an hour or so to chill in the fridge before you’re ready to pack up. If you’re pressed for time, give it 20 to 30 minutes in the freezer. You’ll also want to make sure you have plenty of ice on hand. So while you’re waiting for the cider to cool, your best bet is to head to the local convenience store and pick some up.
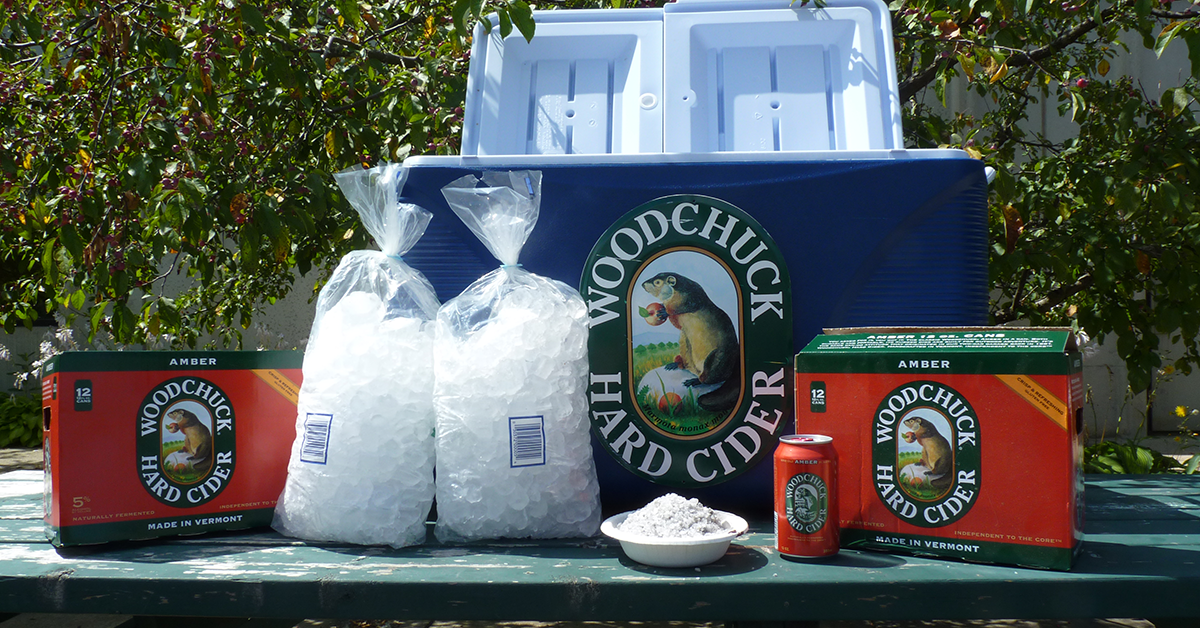
You may be asking yourself, “Well…how much ice do I need?” There’s a bit of science and math behind it. Luckily for us, Professor Rhett Allain, an Associate Professor of Physics at Southeastern Louisiana University, did the work for us. Using physics and heat transfer science, he came up with a great formula for success: for each twelve pack, add one ten-pound bag of ice. Thanks to him for doing the heavy lifting on that one.
How’s that cider cooling down in the fridge? Once it’s nice and chilled, break out the cooler and let’s get to work!
Step 2: Packing a cooler is just like getting ready for a hike.
When it comes to packing a cooler, just like in getting dressed to go hiking, it’s all about layers. As we’re talking about ice-cold cider here, your first layer should come as no surprise. You want to lay down some ice! Our rule of thumb is to pour in just enough ice to cover the bottom of your cooler. You’re going to pack cider on top of this remember, and nothing is more annoying than trying to lay a can with a flat bottom on round cubes of ice. To avoid this, we usually crush our ice before this bottom layer is poured and then fill the cooler about an inch deep.
Step 3: Use the Maximum Chill Zone!
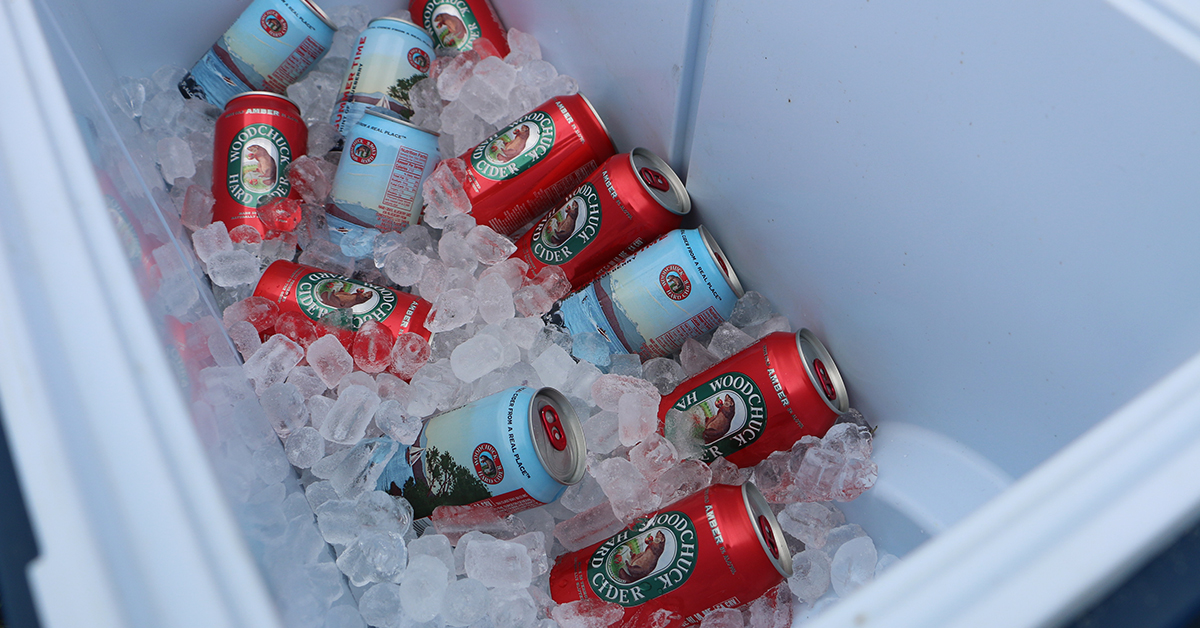
Now you’re ready to pack in some cider! From corner to corner, pack your Woodchuck Amber and Summer Time cans, leaving about a quarter inch from the sides of the cooler for maximum chilling capacity. We’ll call this area of the cooler the “Maximum Chill Zone,” and let’s be honest, it sounds like a good time in and of itself, doesn’t it? Once you’ve packed in all the cider you can get without having to stack the cans, you’re ready for another layer of ice.
Pour in more ice over the top of the first layer of cans.
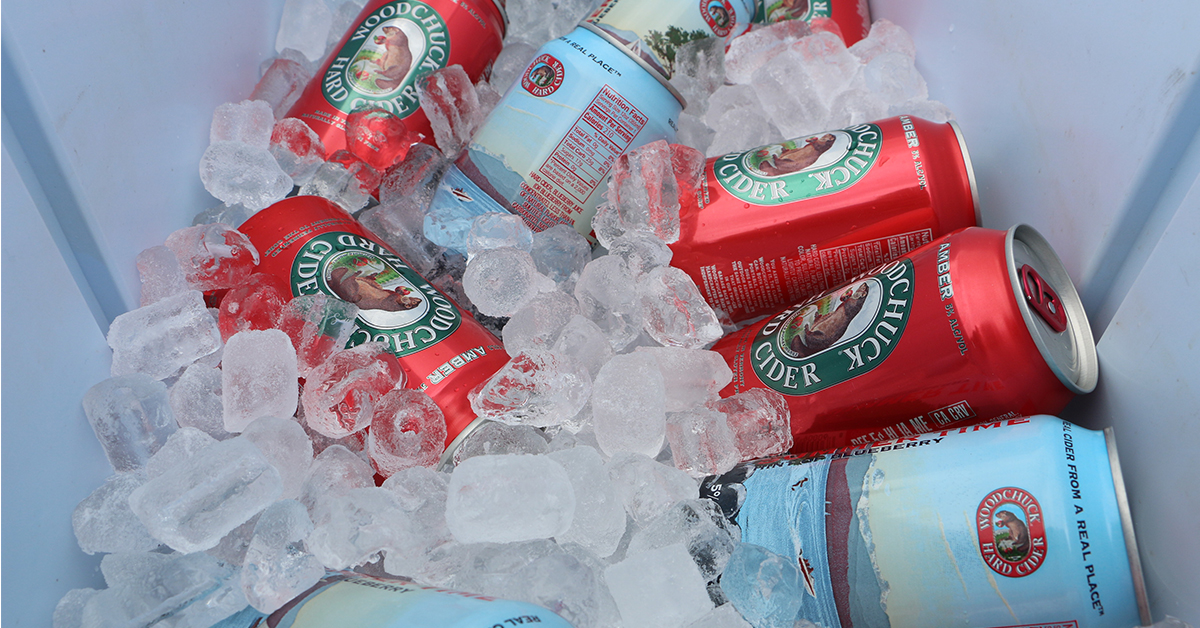
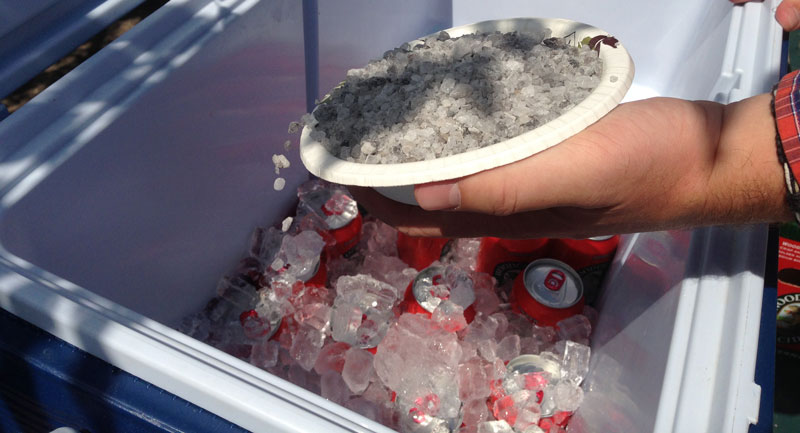
Add more ice to create about a half inch layer over the top. Now, here comes the secret ingredient…
Step 4: We’re ready to ROCK…SALT!
Sprinkle a bit of rock salt over this second layer of ice. You’re probably thinking, “What? Salt in my ice? No way.” Yes way. When you add rock salt to ice that is melting, the salt lowers freezing/melting point of the ice or water. When the ice starts to melt, the salt mixes with it making it colder than the frozen ice. This will keep the ice from melting quickly and also keeps the water from the melting ice super cold.
Step 5: Repeat, and enjoy.
The only thing left to do is to stack more ciders on top and repeating the ice/salt process until your cooler is full! Bring it to your next party or tailgate. Make your friends call you the “Cooler Connoisseur.” Even if you’re just out in your backyard for a barbeque and enjoying a campfire, a cooler of ice-cold craft cider and beer is great thing to have!
Find Woodchuck Amber and Summer Time cans near you using our Locator or Mobile app!
Woodchuck Locator
iOS App: http://bit.ly/WoodchuckAppiOS
Android App: http://bit.ly/WoodchuckAppAndroid